


14 Aug From blank to gift: a relaxed beadable pen project
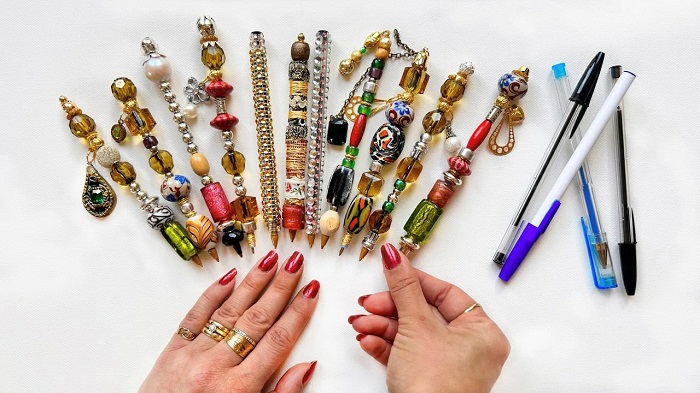
A beadable pen is one of those projects that looks almost too easy. Unscrew the rod, add a few beads, put everything back together, and you are done. That is the basic idea, but the pens people actually keep using usually come from a little more thought. The best combinations feel balanced in the hand, survive a busy handbag, and still look good after the first week.
I recently made three pens in one afternoon: one for a teacher, one for a friend who loves Halloween, and one for my own desk. The process was simple, but making them side by side showed how much difference the small choices can make.
Start With the Pen, Not the Beads
It is tempting to begin with a favorite focal bead and build around it. I have better results when I check the blank first. Take the center rod out and look at the usable length. Some pen blanks allow a tall stack, while others leave less room once the top is tightened. A beautiful arrangement is no help if the last bead keeps the hardware from closing.
The finish matters too. A sleek black blank works well with moody or seasonal themes. Silver and white are easy to pair with bright colors, rhinestones, and clean pastel designs. Touch-screen styles can be useful for customers who work on tablets, while mechanical-pencil versions make practical gifts for students and planners.
Before opening every bead tray, test the pen mechanism. Twist or click it several times and make sure the refill moves cleanly. It takes less than a minute and prevents the frustrating discovery that a finished design has to be taken apart.
Build a Small Working Tray
For each pen, I place the blank, focal bead, two or three coordinating beads, spacers, and any topper on a shallow tray. Limiting the first selection makes the project calmer. A large box of beads can turn a ten-minute design into an hour of second-guessing.
Silicone focal beads are forgiving because they add color without making the pen feel sharp or cold. Acrylic beads bring shine and crisp detail. Rhinestone beads catch light, but they are usually best used as an accent rather than filling the entire stack. Metal spacers can separate similar colors and stop a design from looking like one solid block.
Check the holes before deciding on the order. Two beads that look nearly identical from the outside may sit very differently on the rod. If one opening is tight, do not force it. Save that bead for another finding rather than damaging the pen or stretching the material.
Dry-Fit the Design
My favorite habit is to arrange the beads beside the rod before threading them. I put the largest or most detailed piece near the visual center, then move smaller elements around it. This quick dry fit makes uneven proportions obvious.
For the teacher gift, I used a cheerful character focal with one bright acrylic bead and a simple spacer. The Halloween pen had a darker blank, a themed focal, and a small rhinestone accent. My own pen stayed fairly plain: two neutral beads and one textured center bead. The simplest one turned out to be the most comfortable for long writing sessions.
Once the arrangement looks right, thread the pieces onto the rod and tighten the top until it is secure. It should be snug, but there is no reason to wrench it down. Over-tightening can compress silicone pieces, mark softer beads, or make the hardware difficult to remove later.
Do the Writing Test
This is the step I used to skip. Hold the finished pen as you normally would and write a full sentence, not just a quick line. If the top pulls backward or the pen feels bulky between the fingers, remove one heavy bead or move the largest piece lower in the stack.
Then set the pen on a table and give it a gentle roll. Make sure nothing rattles. Check the twist or click mechanism again. If the decoration blocks normal use, the design is not finished yet, no matter how good it looks in a photo.
For pens intended for sale, I also leave one sample on my desk for several days. Real use catches problems that a product photo never will: a loose top, a rough spacer edge, a finish that scratches too easily, or a stack that slowly rotates out of place.
The pleasure of this project is that there is no need to make twenty at once. Start with one useful pen, learn what feels right, and adjust the next design. A reliable source with character styles, rhinestone options, touch-screen versions, pencils, extenders, and craft-ready blanks also makes it easier to plan coordinated projects without hunting through unrelated listings. That is why I like browsing a well-organized range of beadable pen blanks and supplies
No Comments